

ColourPop "Up and Away" and "Can You Knot" Lip Bundles
Liquid lipsticks are the entire craze right now and one of the top brands out there is ColourPop, which offers a wide variety of shades and finishes for very cheap prices. ColourPop’s Ultra Matte Lips are the most popular products and there are so many shades to choose from! There’s so many that ColourPop usually releases lip bundles so it’s just a little easier to decide which shade you want to buy and wear. Recently, ColourPop released their fall collection lip bundles with combinations of their glossy, satin, and matte finishes. I was able to get my hands (or should I say… lips) on two of their lip bundles – Up and Away & Can You Knot. Keep reading to learn more about ColourPop’s lip bundles and some swatches of the shades!
Up and Away
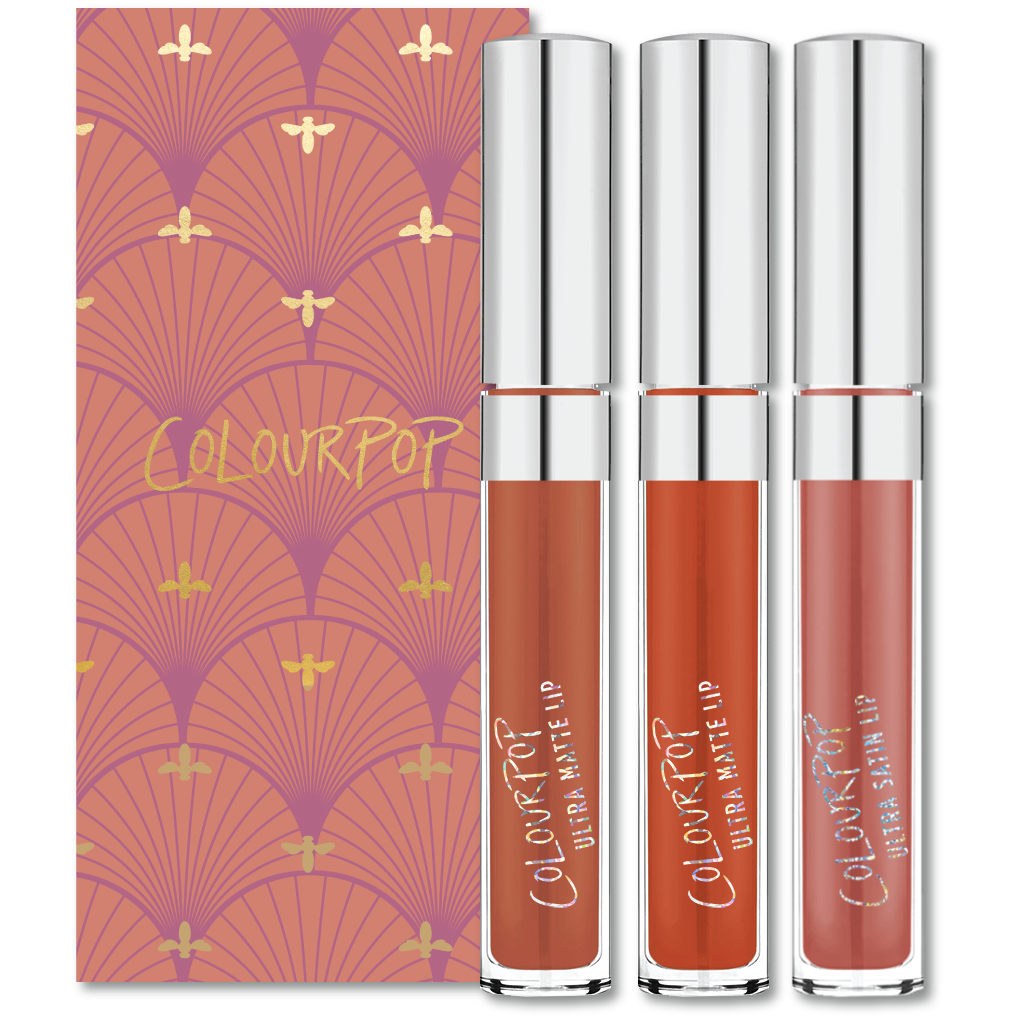
(via ColourPop Cosmetics)
(via ColourPop Cosmetics)
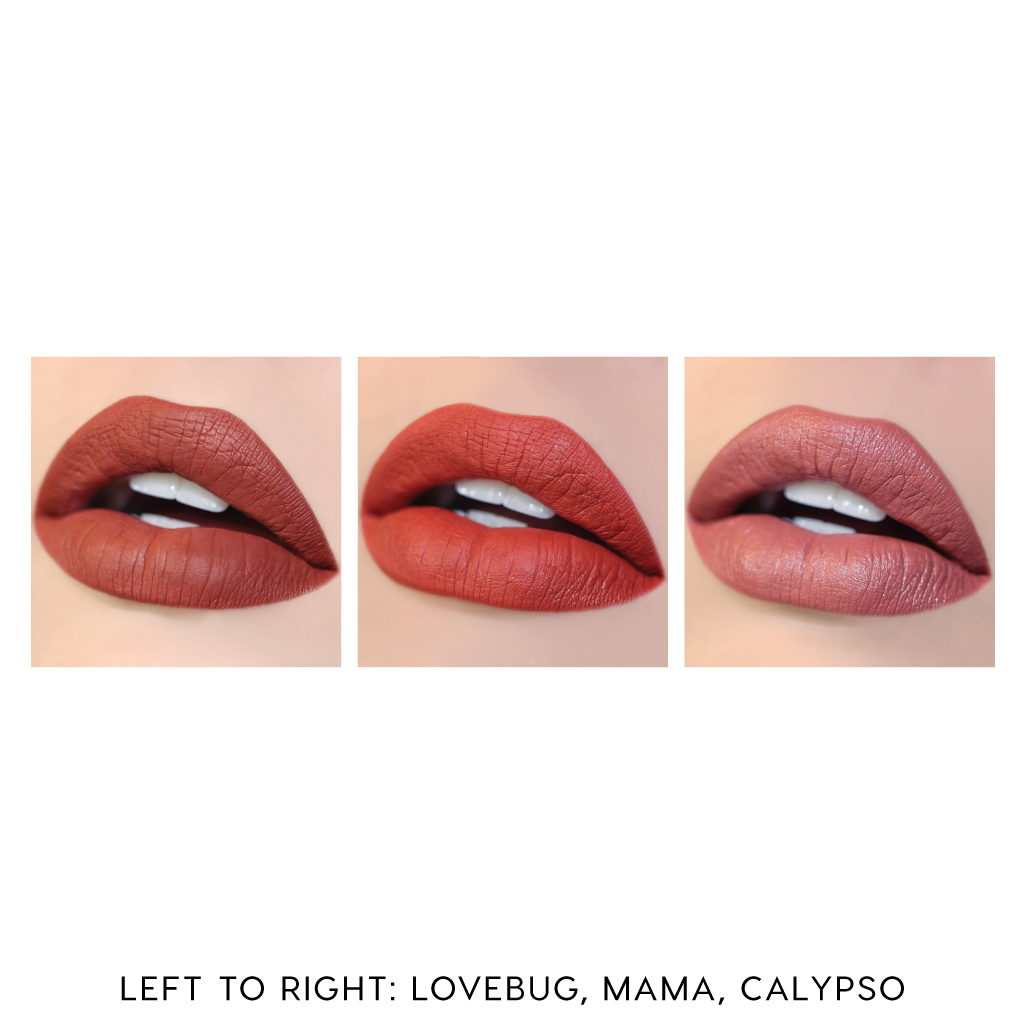
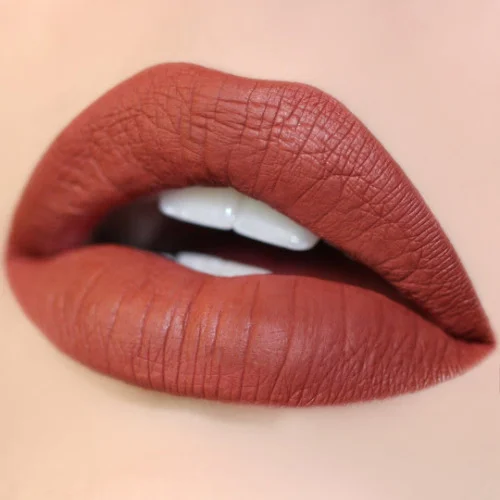
ColourPop’s Up and Away lip bundle is a trio of warm toned shades. The three shades are Love Bug, Mama, and Calypso. Love Bug is a rich mahogany matte finish, Mama is a burnt orange matte finish, and Calypso is a mid-tone pink satin lippie. My favorite out of the three is Love Bug. Mama looks too orange on my skin and Calypso is just like any other pink shade on me. I’m only speaking for myself. You never know what shade looks good on you until you try it!
Can You Knot
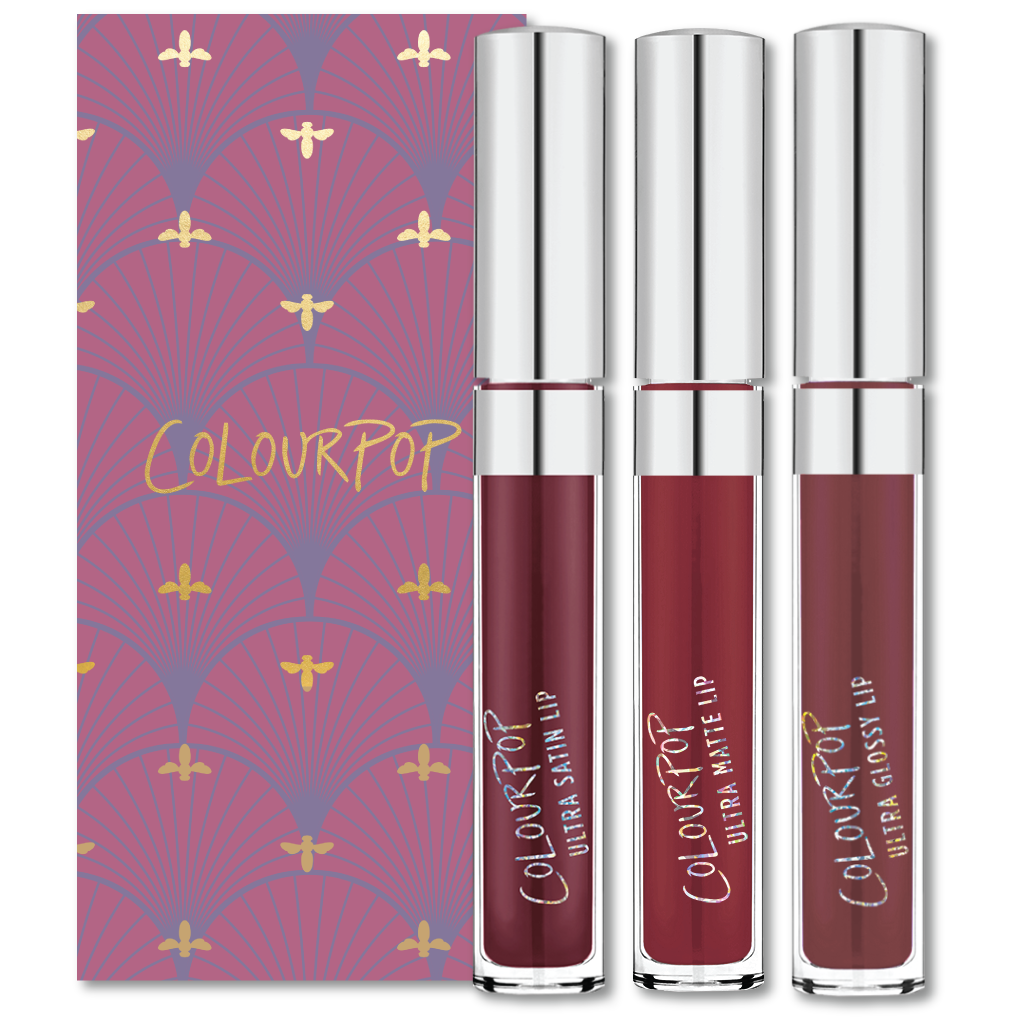
(via ColourPop Cosmetics)
(via ColourPop Cosmetics)
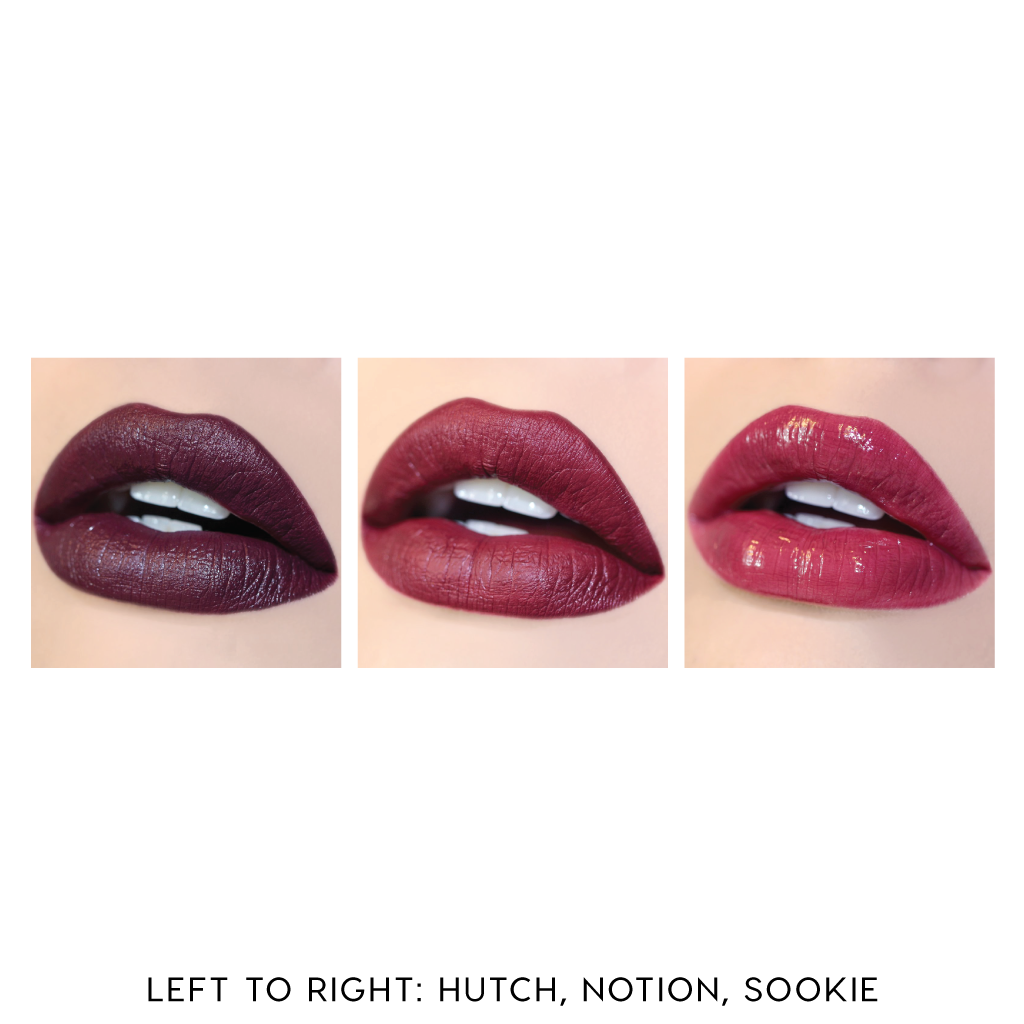
Unlike the Up and Away lip bundle’s warm tones, ColourPop’s Can You Knot lip bundle features darker, berry shades. The three shades included in the Can You Knot lip bundle are Hutch, Notion, and Sookie. Hutch is a deep blackened violet satin finish. Notion is a deepened raspberry matte shade. Sookie is a full-coverage rich plum glossy finish. Of the three shades in the Can You Knot lip bundle, Notion is my favorite. Hutch is a little too dark for me and I don’t like glosses at all… so Sookie is out of the question. But it does look like a great finishing touch to layer over Notion if you ever want to go from a satin look to a glossy look.
For the last few months, ColourPop has been my go-to for lippies. Like I said, they offer a wide variety of shades and finishes to choose from. Each lippie is about $6 and domestic shipping is free for orders over $30! For $30, you can get FIVE lippies. That would afford you just one (maybe two if you’re lucky) lippie from higher end brands. I will definitely be adding more shades to my collection. You can find more lip bundles and collections on ColourPop's site.
Have you tried ColourPop lippies before? What’s your favorite shade?
Let us know in the comments! Don’t forget to follow us on social media.

6 Ways to Keep Your Skin Hydrated During the Winter.
by Val N

Hey everyone! Winter is coming and if you’re like me, you probably suffer from dry, chapped skin during the cold season. Kirsten and I have talked about it so many times; we constantly complain about our dry skin and how we can remedy it. Well have no fear! This week’s beauty editorial is to provide you with some tips on how to keep your skin hydrated… even during the winter season so you can look fresh and glowing all year long!
1) Drink Water
This is a no-brainer but the key to staying hydrated is to drink plenty of water, no matter what season it is. Oftentimes, I opt for soda or coffee, which actually dehydrate you. To fix this problem, I bought a water bottle that has marks for 8oz, 16oz, 32oz, etc. I bring that water bottle to work and leave it on my desk so it’s constantly in my sight. And it’s a constant reminder to keep drinking water. There are also apps, such as Waterlogged, that remind you to drink up and help you track your water intake so you can stay hydrated.
2) Exfoliate Once a Week
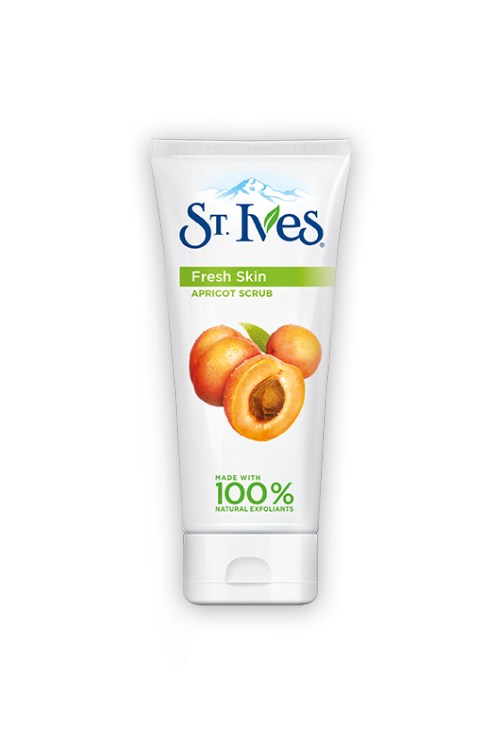
As contradictory as it sounds, exfoliating once a week helps to keep your skin hydrated. I say once a week because if you overdo it, you’ll end up with even dryer skin or worse… I’ve overdone it before and my skin started breaking out. The point of exfoliating is to get rid of the dry, top layer of your skin and allow newer, fresher skin to reveal itself. I like to use St. Ive’s Apricot Fresh Skin Scrub.
3) Use a Facial Moisturizer
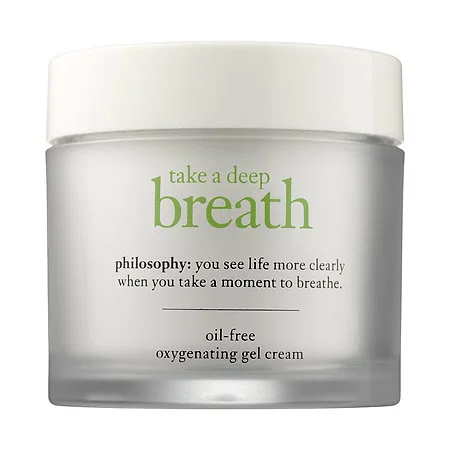
After exfoliating, make sure to apply moisturizer to keep your skin hydrated. Since my skin tends to be dryer during the winter time, I switch to gel based moisturizers. It really helps lock in the moisture compared to cream based moisturizers. One of my favorites is Philosphy’s Take a Deep Breath Oil-Free Oxygenating Gel Cream. For something more affordable, I also like to use Garnier’s SKINACTIVE Moisture Rescue Refreshing Gel-Cream, which is very lightweight and smells so good!
4) Carry Lotion with You
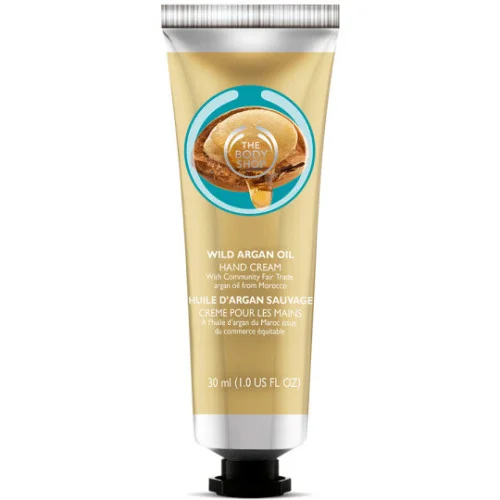
It’s as important to keep the rest of your body as hydrated as your face. For the last few years, I’ve worked in the restaurant industry as a server. That means I’m constantly washing my hands, which tends to dry my skin out. And it’s worse in the winter time. So over the years, I’ve learned to always carry hand lotion with me and apply it right after I wash my hands. I have a bottle of Yes to Coconuts Protecting Hand & Cuticle Cream on my desk at work and I also keep a tube of the Body Shop’s Wild Argan Oil Hand Cream.
5) Apply Lip Balm
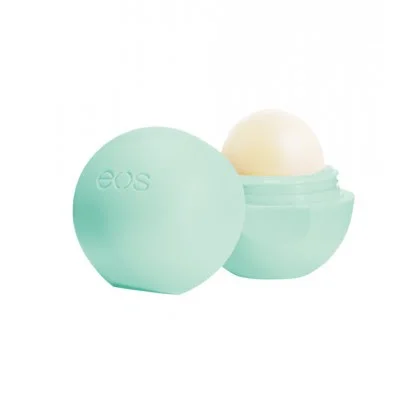
On top of carrying hand cream in my purse, I also make sure to carry lip balm with me. It’s an absolute essential for me throughout the entire year. Sometimes we forget our lips are also considered skin and it’s one of my biggest pet peeves when my lips are chapped and unkissable. My all-time favorite is EOS Smooth Sphere Lip Balm in Sweet Mint. It leaves my lips soft, supple, and kissable! It also tastes sweet like mint.
6) Use a Face Spray
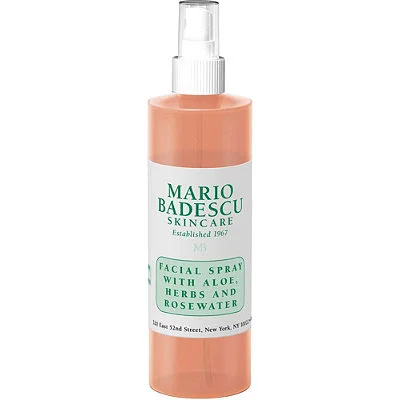
This is a bonus tip because I prefer to use a face spray during the summer. But it works just as well in the winter time! During the summer time, I spritz face spray to freshen up and cool off. But during the winter time, you can use face spray to keep your skin hydrated when when it’s feeling dry. My favorite is the Mario Badescu Facial Spray with Aloe, Herb, and Rosewater. It’s cheap, portable, and smells just like roses!
Those are 6 tips on how to keep your skin hydrated during the winter time. What are some of your tricks for keeping your skin hydrated? Let us know! Don’t forget to like and follow us on social media.

5 Favorite Fall Lip Colors
by Valerie N
The fall season is in full swing and with the cold weather come boots, flannel, scarves, pumpkin spiced everything, and of course… fall lip colors. You’ve got your choice between gloss, satin, or matte finishes. And beyond that, you get to choose your favorite range of shades from nudes, to pinks and reds, to dark stained lips. Wearing different lip colors are my most recent favorite way to finish my makeup look and to express myself. I’ll wear a certain shade all depending on my mood. When it comes to fall time, I usually lean towards darker shades. Keep reading to find out 5 of my favorite fall lip colors!
1. Smashbox Be Legendary Lipstick in “Fig”
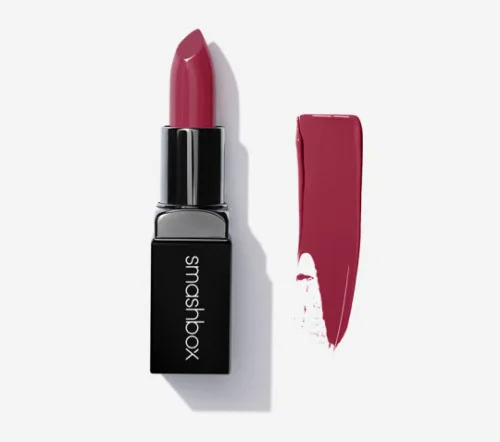
The Smashbox Be Legendary Lipstick in the shade “Fig” is great for fall. The site describes the shade as “red grape” and I think it’s perfect for more casual days when you’re headed to class or meeting a friend for coffee. Unlike my other favorite fall lip colors, this product is satin-smooth and also works to hydrate your lips. It also contains ingredients such as shea butter, vitamin C, and vitamin E to protect your lips. With this lipstick, you’ll be looking… wait for it… legendary.

2. NYX Liquid Suede Cream Lipstick in “Vintage”

The NYX Liquid Suede Cream Lipstick in “Vintage” is the absolute perfect vampy shade for fall. NYX’s website describes the shade as “plum with mauve undertone.” I love their Liquid Suede line because the product glides on so easily and stays put for a long time. I can go a whole night without having to re-apply. The only thing about the “Vintage” shade is that it’s so dark but sheer, you have to apply a few layers or else it’ll look blotchy.
3. NYX Liquid Suede Cream Lipstick in “Soft-Spoken”
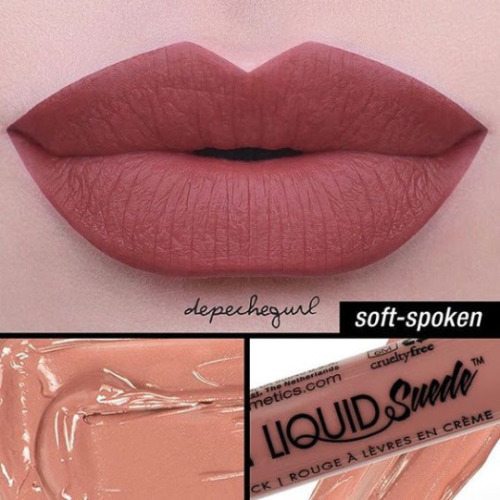
Another one of my favorite shades from the NYX Liquid Suede collection is “Soft-Spoken.” The shade is described as a mauve nude and it’s perfect for all seasons. I’ve worn it throughout the summer and plan on wearing it well into the wintertime. I’ve gotten so many compliments while wearing this color and will continue to use it until I run out… or find a new favorite shade.
4. ColourPop Ultra Matte Lip in “Tulle”
If you can’t tell by now, mauve nudes are my favorite lip shades. Another mauve nude that’s my favorite is the ColourPop Ultra Matte Lip in “Tulle.” Tulle is described as a dusty mauve burgundy. It definitely looks like I have wine stained lips when I wear this shade. And there’s definitely nothing wrong with that.
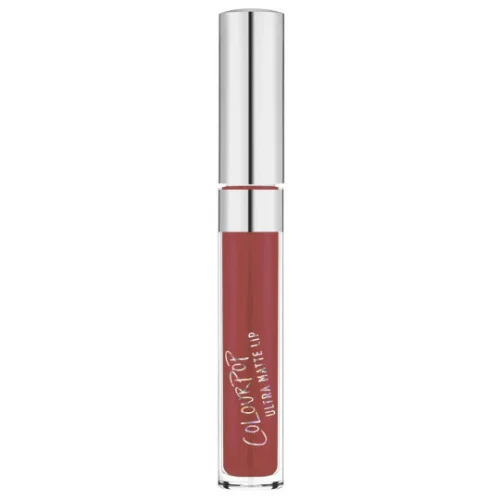
5. ColourPop Ultra Matte Lip in “Love Bug”
ColourPop’s Ultra Matte Lip products have easily and quickly replaced NYX lip products as my favorite. They’re cheap, easy to apply, long-lasting, and the perfect dupes for the Kylie Cosmetics Matte Lip Kits because they’re basically the exact same formula. Another ColourPop Ultra Matte Lip shade I’ve been wearing a lot lately is “Love Bug.” Unlike the other berries and mauves I’ve mentioned, this shade is more of a rich terracotta and I think it looks great on my warm toned skin. This is another shade I can see myself wearing during both winter and summer times.
What are some of your favorite lip shades for fall? Let us know! Don’t forget to follow us on social media for more updates.

Product Review: Rimmel London's Kate Sculpting Palette
by Valerie N.
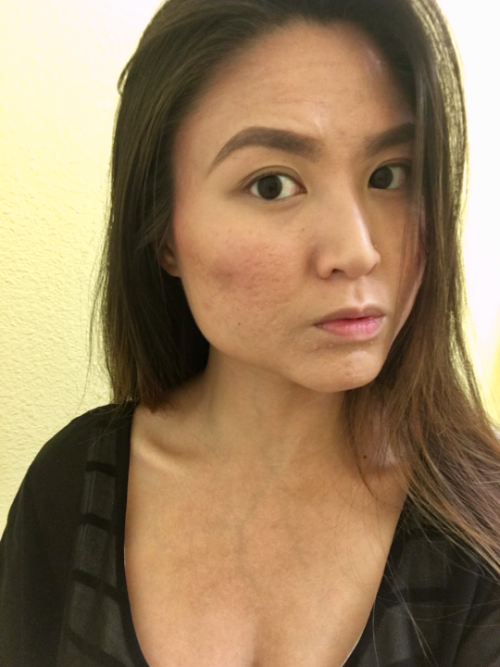
Hi everyone! Rimmel London recently released their very first sculpting and highlighting kit designed by the one and only Kate Moss. I was roaming around the makeup aisles at Target awhile ago when I saw this contour kit on sale. Rimmel’s Natural Bronzer is one of my absolute favorites so naturally, I had to give this sculpting palette a try. It’s available in three different shades – golden sands, coral glow, and golden bronze. I got the kit in the shade “coral glow” and if you want to find out more about this product, keep reading!
Rimmel London’s Kate Sculpting Palette
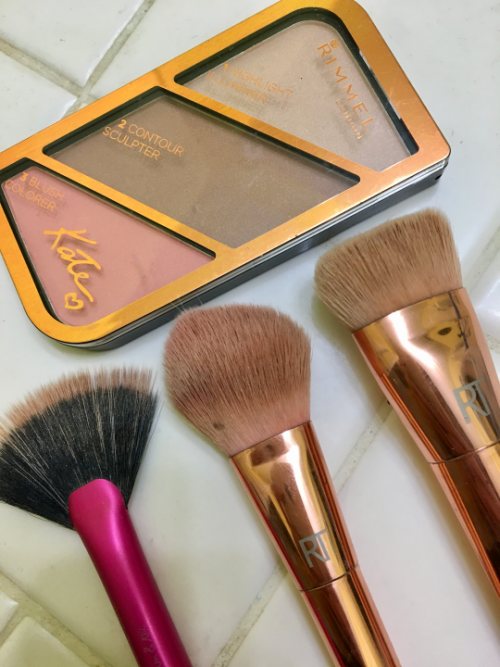
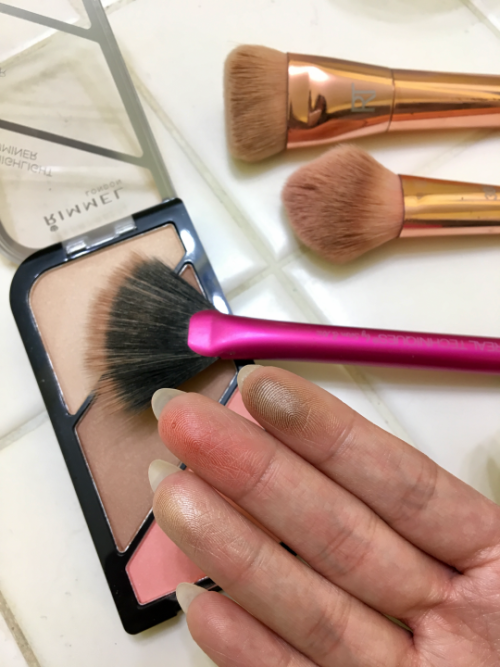
According to Rimmel’s website, the Kate Sculpting Palette is “Rimmel’s first sculpting & highlighting kit designed by Kate Moss.” First, you use the “shading powder to contour the sides of the nose, jawline, and forehead.” Then use the “powder blush for contour and definition.” Lastly, you use the “soft shimmer powder to highlight the cheekbone, brow bone, center of the chin, and bridge of the nose.”
Before Contouring

After Contouring
by Valerie N. (Twitter || @avec_valerie)
Hi everyone! Rimmel London recently released their very first sculpting and highlighting kit designed by the one and only Kate Moss. I was roaming around the makeup aisles at Target awhile ago when I saw this contour kit on sale. Rimmel’s Natural Bronzer is one of my absolute favorites so naturally, I had to give this sculpting palette a try. It’s available in three different shades – golden sands, coral glow, and golden bronze. I got the kit in the shade “coral glow” and if you want to find out more about this product, keep reading!
Rimmel London’s Kate Sculpting Palette
According to Rimmel’s website, the Kate Sculpting Palette is “Rimmel’s first sculpting & highlighting kit designed by Kate Moss.” First, you use the “shading powder to contour the sides of the nose, jawline, and forehead.” Then use the “powder blush for contour and definition.” Lastly, you use the “soft shimmer powder to highlight the cheekbone, brow bone, center of the chin, and bridge of the nose.”
Before Contouring

After Contouring

The lighting isn’t the best and I was having a bad skin day (due to PMS) but I hope you can see the slight difference. My cheekbones are a little more defined and have some color to them. But trust me, it’s more noticeable in better lighting and in real life!
Pros
- $6.49 plus tax at Target
- soft and velvety texture
- good pigmentation
- different shades to choose from
- 3-in-1 kit – you get bronzer, blush, and highlighter without having to buy them separately!
- subtle but still noticeable
- easy to blend
- perfect for everyday wear
- back of the kit shows you how and where to contour/highlight
Cons
- kit does not include a mirror (which would be nice but isn’t a deal breaker for me)
- highlighter isn’t as noticeable as others
Final Verdict
Honestly, there aren’t too many cons about this sculpting kit. Overall, I’m very satisfied with this affordable drugstore contouring palette. It has a nice feel, it’s lightweight, and it does the job well. If you’re a beginner looking for a contour kit to start with, definitely give the Kate Sculpting Palette a try! And if you liked this post, stick around. Maybe I’ll teach you how to contour/highlight next time!
What products do you use to contour/highlight? Let us know! Don’t forget to follow us on social media for more updates.

7 Ways To Get Optimal Beauty Sleep.
by Val N.
Daylight Saving Time ends this coming Sunday so don’t forget to set your clocks back an hour! But more importantly, we all get an extra hour of sleep. I know I’m excited! Especially when you’re constantly keeping busy with work, school, and a social life, it can be difficult to get the right amount of sleep every night. But I’ve found some tricks that help me get a good night’s sleep. Here are 7 ways to get optimal beauty sleep.
1. Set a Sleep Schedule
Setting a sleep schedule may seem childish but it will definitely help you sleep better. Try to get daily activities, like packing your lunch or planning tomorrow’s outfit, out of the way before your bedtime. Then try to wake up at the same time every morning, even on weekends. That way, your body and sleep cycle are in sync. Try to do this for a few weeks and your body will get used to waking up at the same time every day.
2. No Caffeine After 5PM
I am a bonafide caffeine addict. I’ve said this many times before and I’ll say it again because it’s true – my day hasn’t truly started until I’ve had my first cup of coffee. But over the years, I’ve found caffeine to be the reason why I can’t sleep at night. Whether I’m sipping on soda, coffee, or tea, I force myself not to drink any after 5pm. That’s my cutoff time. Or else I’ll be wired and can’t sleep at night. It’s all about self-control and I believe this is one of the reasons why so many people, like myself, are addicted and dependent on caffeine.
3. Work Out
A lot of times when I come home from work, I’m so tempted to change into my pj’s and take a very long nap. Then I realized napping took away time from being productive and getting things done during the day. I’d always wake up feeling more tired and I wouldn’t be able to sleep at night. So now instead of taking a nap, I go to the gym for 45 minutes to an hour. Even if I’m tired, I force myself to go because I know I’ll leave the gym feeling much more energized. Not to mention, working out releases endorphins, which relieve stress, and makes it easier to fall asleep at night.
4. Take a Hot Shower or Bath.

Some people like to shower when they wake up in the morning but I like to do it before bedtime. I do it because I like going to bed feeling fresh and clean. Taking a hot shower also helps me relax and calm my nerves, making it easier to fall asleep.
5. Use Lavender Oil

Another thing that helps me calm my nerves and sleep at night is lavender oil. I have a small bottle of essential lavender oil, which I rub on my wrists and the soles of my feet. I can instantly feel myself relaxing and getting ready to fall asleep. You can also leave drops of lavender oil on your sheets and pillow case to optimize your beauty sleep. Drops of lavender oil can also be added to your bath or shower to help you relax.
6. Drink a Glass of Water Before and After Sleeping
I don’t like going to bed with an empty stomach. But I also don’t like to snack before bed. So I drink a glass of water before going to sleep. I purposely do this so I wake up with a full bladder and have to get out of bed. It may sound funny but it’s one of my secrets. And it works better than setting multiple alarms just minutes apart from each other. I also drink a glass of water when I wake up to get my metabolism going. It also helps me be more alert and energized in the morning.
7. No Electronics Before Bedtime
This is probably the most important factor for optimal beauty sleep but so many people, including myself, fail to go through with it. With so many social media apps and games to play, it’s hard to put your phone down before bed. But in order to get a good night’s sleep, it’s absolutely essential to shut off all electronics – your phone, laptop, tablet, tv – at least an hour before going to bed. It’s because these electronics emit a blue light, which mimics sun light, and tricks your brain into thinking it’s day time. To trick your brain into thinking it’s bedtime, just shut your electronics off. Instead, opt for journaling, meditating, or reading an actual book before bed.
Those are some of the tricks I’ve used to get optimal beauty sleep! What are some of your tips for getting a good night’s sleep? And don’t forget to set your clocks back an hour on Sunday!
4 Halloween Makeup Looks To Try.
by Val N.
DIY, and make it fun!

October is quickly coming to an end and it’s almost that time of year again! Halloween is just around the corner and if you’re anything like me, you’re still scrambling to come up with a costume idea. We all know there’s gonna be multiple Harley Quinn’s and Minnie Mouses this Halloween. Why not go for something different so you can stand out in the crowd? And get tons of flattering compliments while you’re flaunting your look.
Not even gonna lie, I’ve been Minnie Mouse before. I’ve also been a sailor and an army girl. And we all know Halloween costumes can get very pricy. So this year, I’m trying to spend as little money on my costume as I possibly can. Plus, I want to play around with makeup so I’ve decided to do a Halloween look where I can do just that. Although I haven’t exactly decided what I want to do, I went to Pinterest for some ideas. Here are 4 Halloween makeup looks and tutorials you and I can pull off!
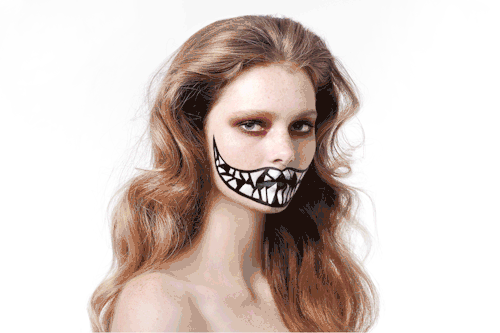
1. Zombie
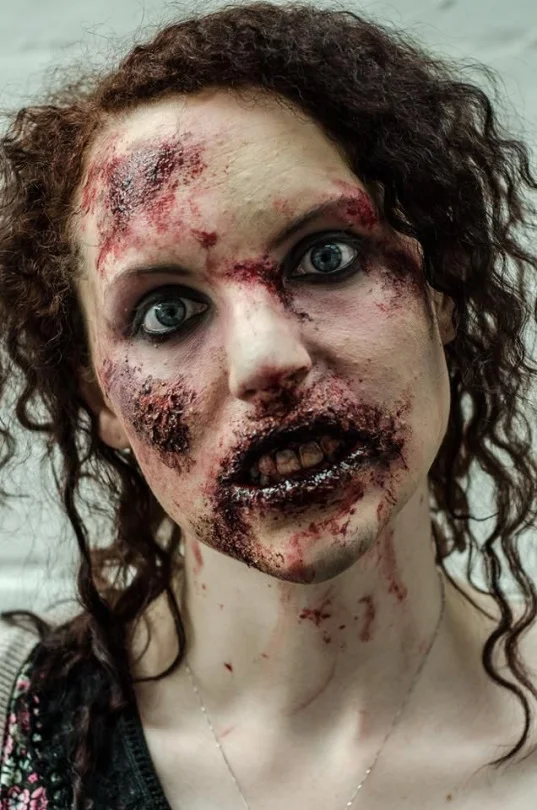
Okay, I’ve been obsessed with The Walking Dead. Rather than going for a sexy costume this Halloween, why not switch it up with something scary like a zombie? I’m sure you’ll be getting compliments on your makeup skills all night.
2. Deer/Fawn

The deer/fawn makeup look was a huge hit for Halloween last year. So huge, it’s been overdone but I still want to try this look. I found a bunch of tutorials but really liked this one by From Head to Toe because of the cute headband she also created.
3. Cat
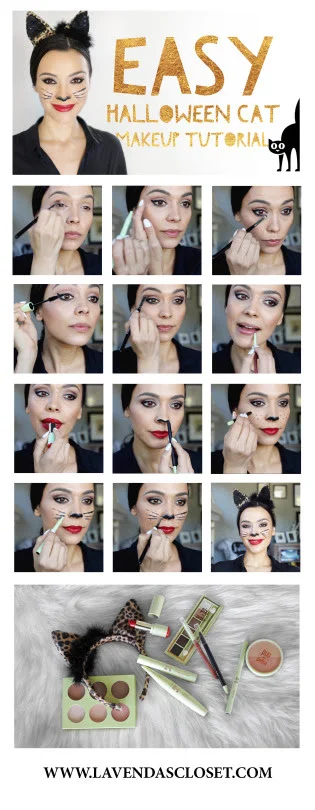
This one is just as cute and simple as the fawn look. I’ve been a cat before but never went past the cat eyes. This tutorial by Lavenda’s Closet also shows you how to do the lips and whiskers. Plus, she also has a super cute headband!
4. Snapchat Filter
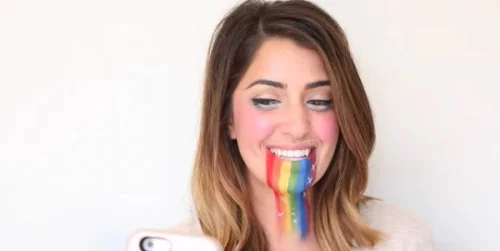
I was actually joking about going as a Snapchat filter but look what I found! A page for not one, but four, Snapchat filter makeup tutorials. The puking rainbows filter is a classic but I was thinking about going as the dog filter. Check out all four tutorials on eHow!